How I built dynamic social media images in Eleventy using Cloudinary
For this blog, I have added dynamically generated social media images (think: <meta property="og:image" ...) based on the title of each post. There are many elegant solutions out there for this.
I didn't use any of them.
This is a quick and dirty way to achieve this. Though this was also the easiest way for my brain to wrap itself around the problem.
Assumptions
- You're using Eleventy (11ty)
- You're using nunjucks templates
- You have a Cloudinary account (the free tier is plenty for what we're doing here)
- You want a social media image that has a background, and that background image is already in your Cloudinary media library
Pros to this approach
- Simple, easy to understand
- No new packages needed
- No need to add any funky bits to 11ty
Cons to this approach
- Harder to update
- Harder to share across projects
TL;DR
<!-- in your <head> partial -->
<!-- if we're on the homepage... -->
{% if './src/index' in page.inputPath %} ...
<!--  ... use a default social image  -->
<meta
  property="og:image"
  content="https://res.cloudinary.com/path/to/default/socialimage.png"
/>
{% else %}
<!-- if not on the homepage, use include the ogimage partial -->
{% include './ogImage.njk' %} {% endif %}
Then we have a stand alone partial called ogImage.njk:
<!-- in ogImage.njk -->
<meta
  property="og:image"
  content="https://res.cloudinary.com/chipcullen/image/upload/c_fill,e_negate,h_630,w_1200/c_fit,g_west,h_630,l_text:SourceSerif4Bold.ttf_70:{{ title | urlencode }},co_white,w_1000,x_20,y_20/g_south_west,l_text:Roboto_35:ChipCullen.com,co_white,x_20,y_40/v1669146466/pthalo_blue_texture_fyc8cy.png"
/>
This template contains a reference to a Cloudinary URL that injects the title of our social post as an overlay, which the Cloudinary API will impose, on-the-fly, into a final image.
How did we get here?
- Exploring a lot of permutations in the Cloudinary advanced Editor
- Uploading a custom font
- Making a template file that uses the https API from Cloudinary with our title inserted
Getting Started with the Cloudinary Editor
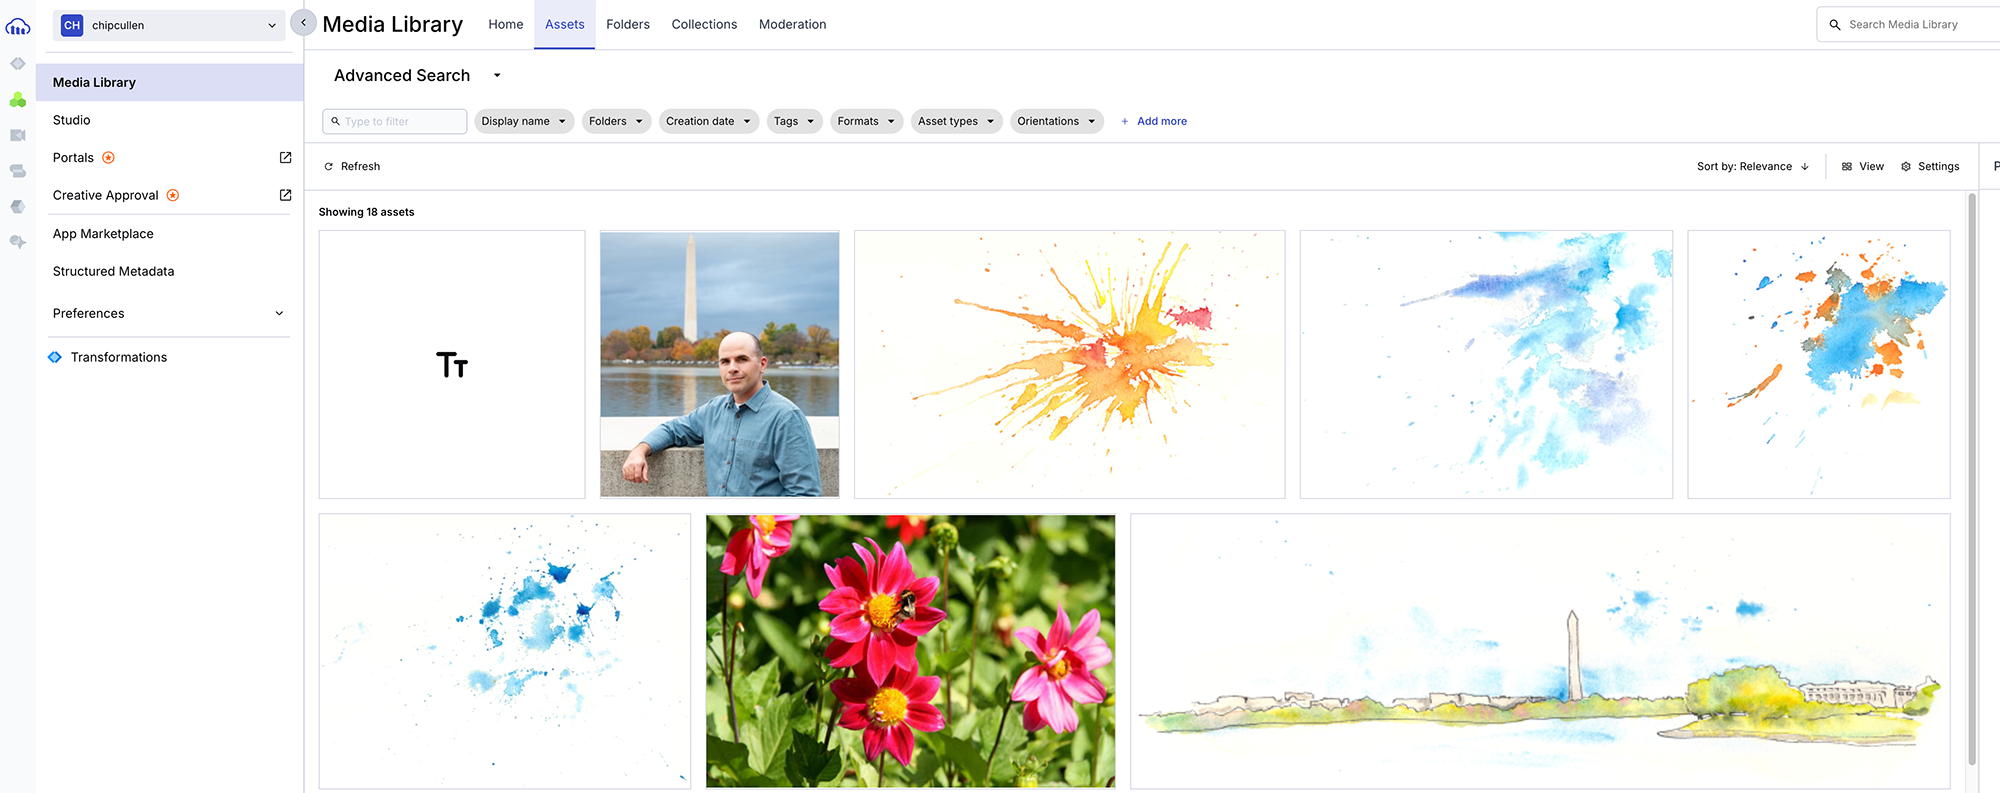
As of this writing, in Spring of 2025, the Cloudinary Media Library looks like this:
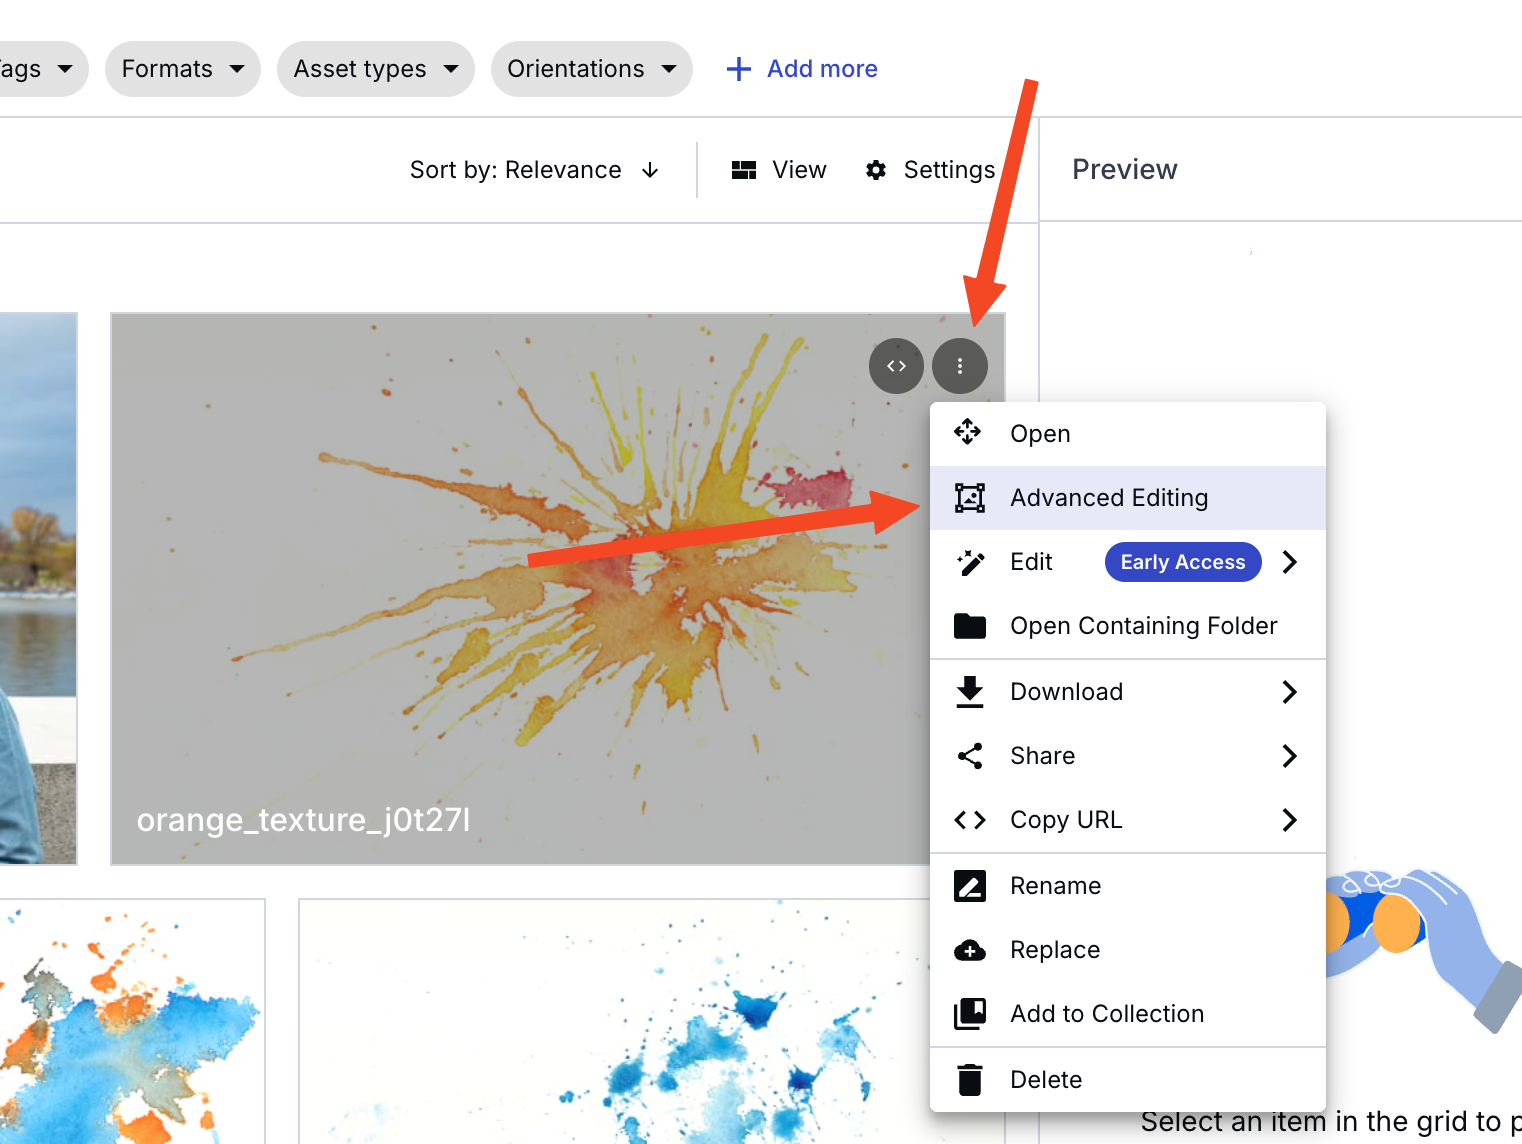
Find the image you want to server as your background, and access it's advanced editor:
Which then takes you to the advanced editor itself (note in this image I've already set an "Effect" of "Negate", which is like the Photoshop "Inverse" command):
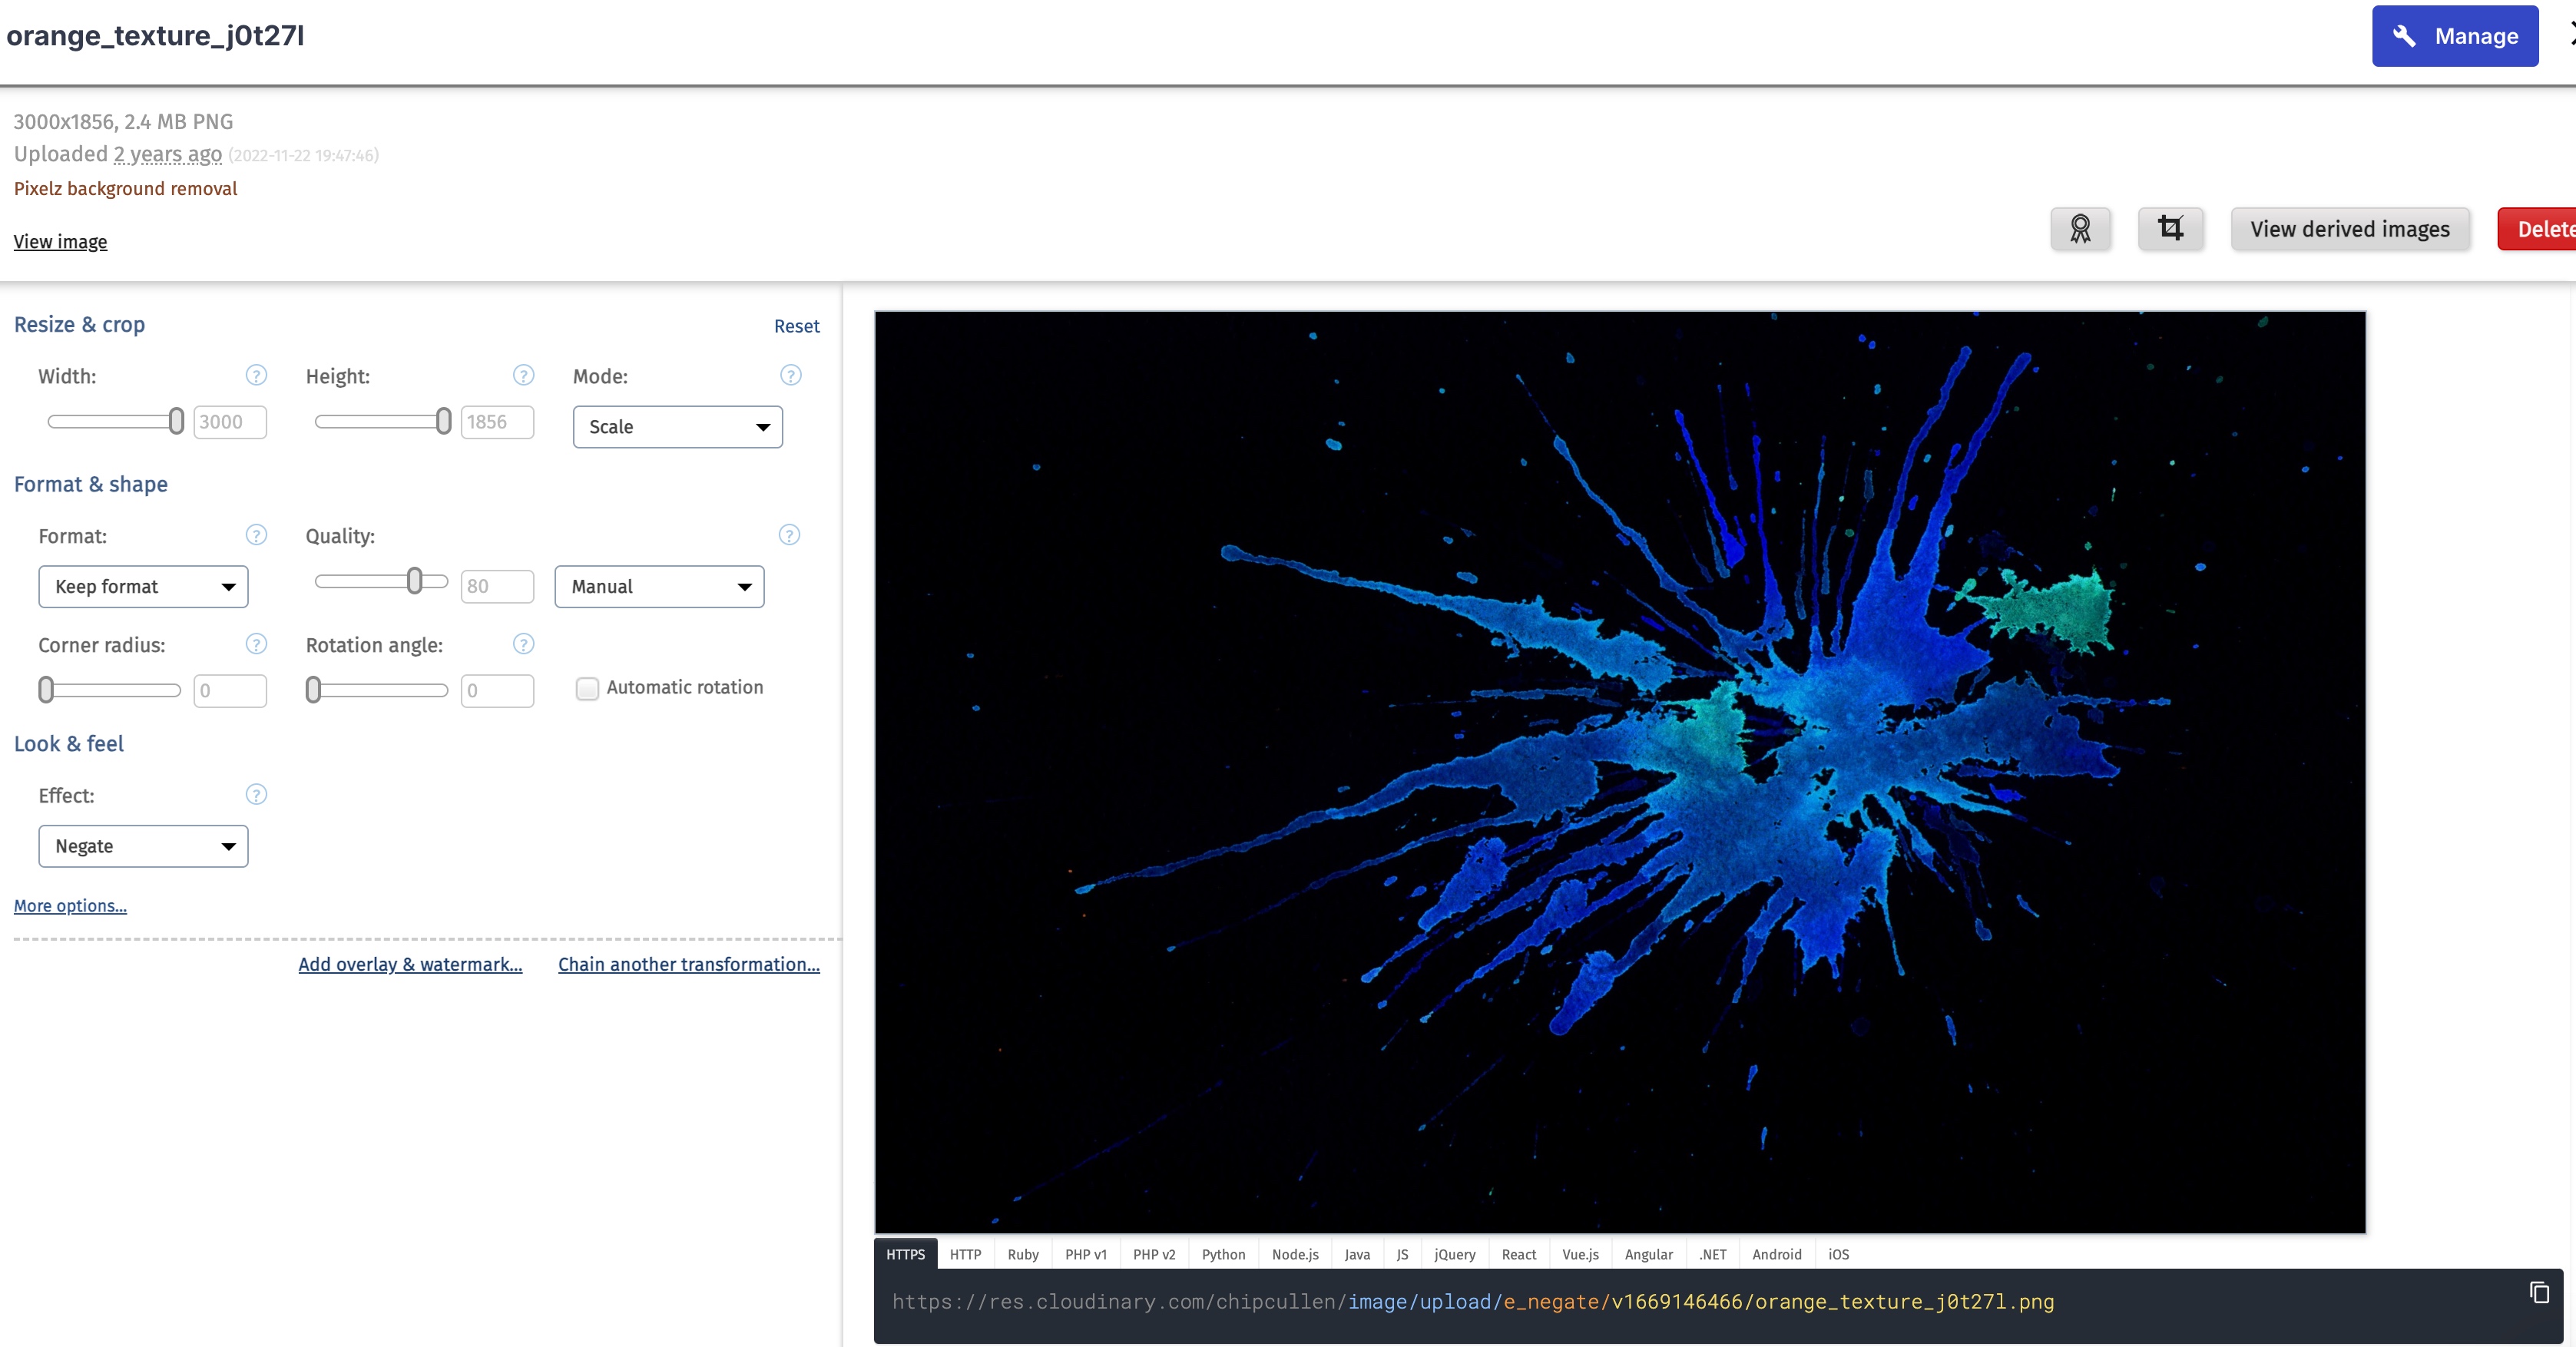
(I think this is in actually the old school Cloudinary editor, and the default editor has been updated. However, the kind of operations we're doing are really only possible with the "Advanced" editor.)
In the editing controls, you will want to set the width to 1200 and the height to 630. Here are the OG image recommendations from Facebook.
Here is what my image looked like with the initial transformations applied:
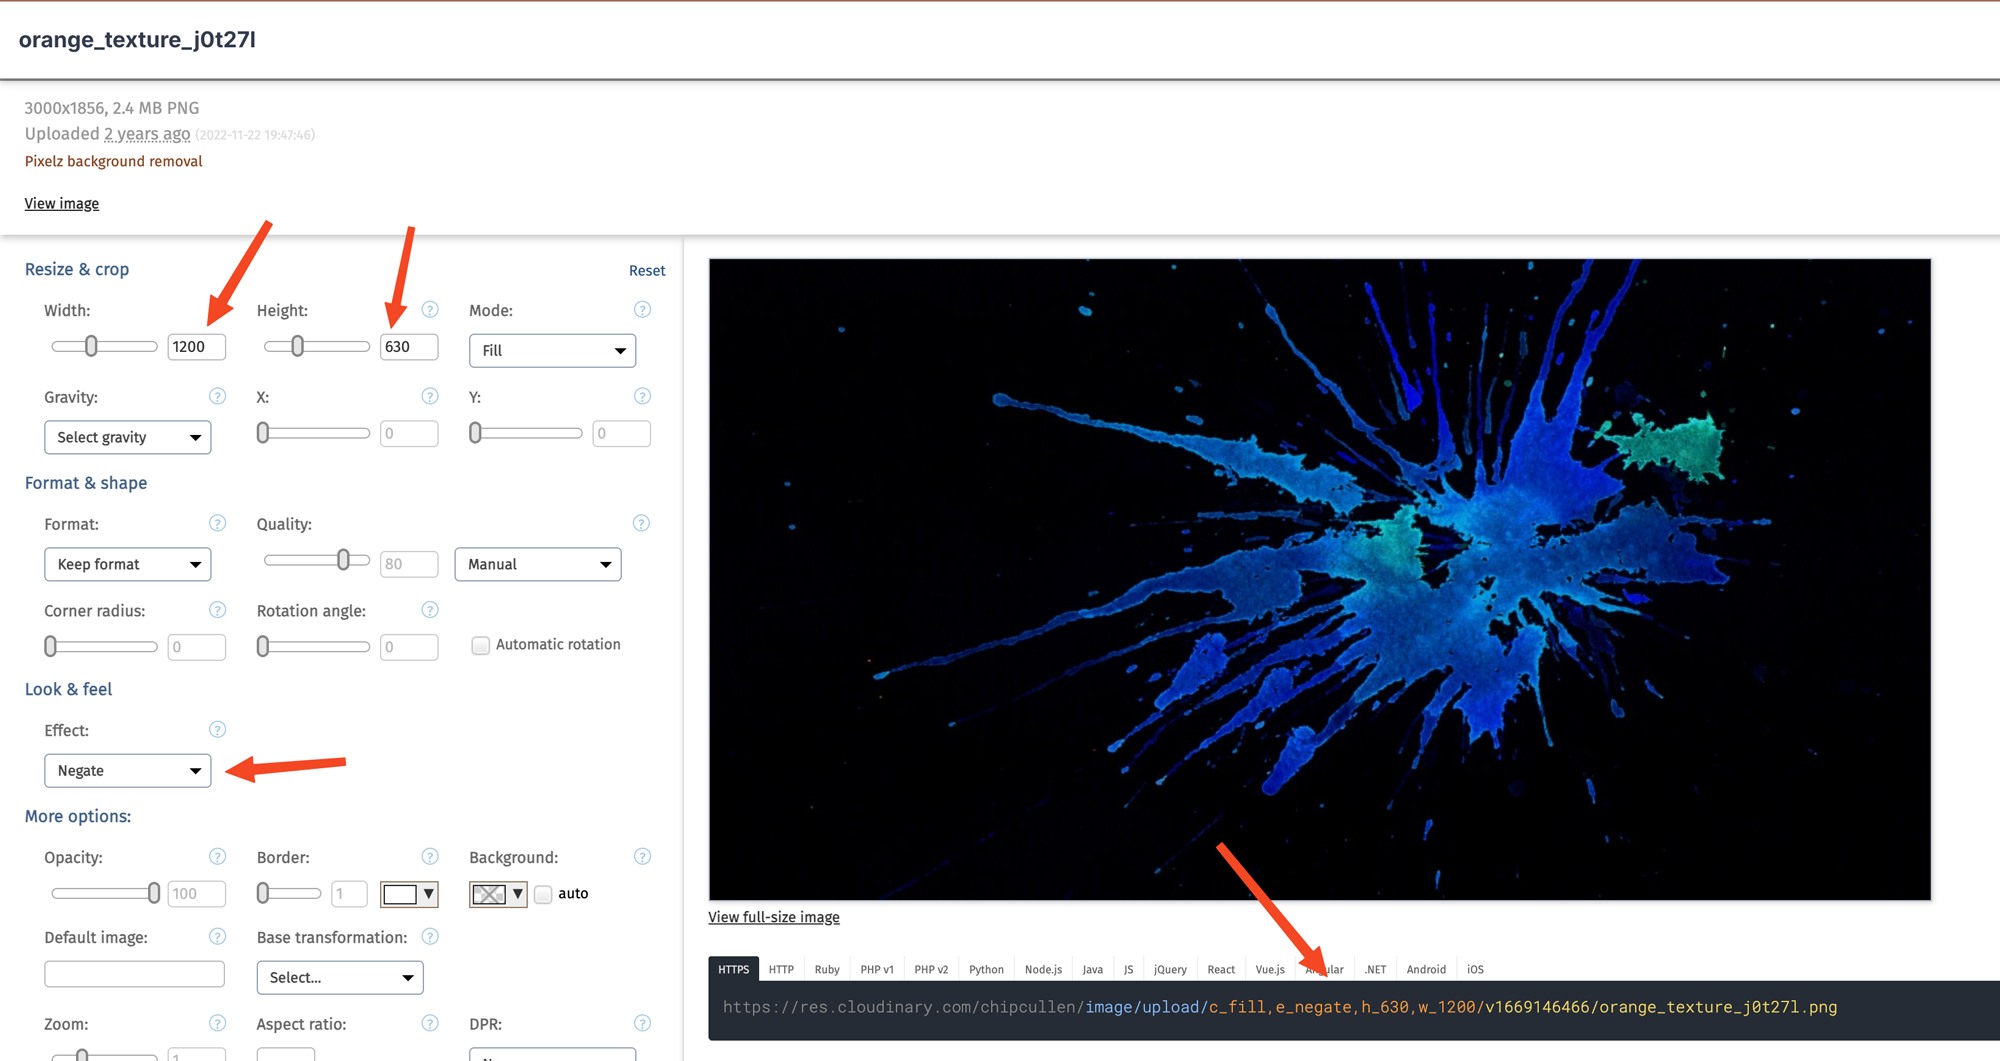
The important thing to note here is how the URL output updates, like so:
https://res.cloudinary.com/youraccount/image/upload/c_fill,e_negate,h_630,w_1200/v1669146466/filename.png
We're going to rely on the URL api for our implementation overall.
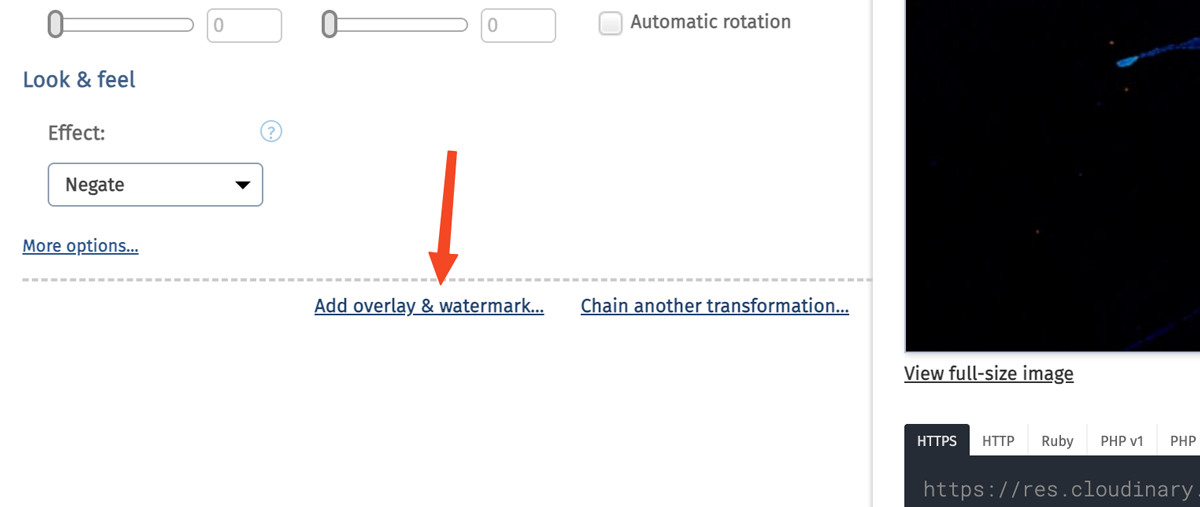
Adding an Overlay
The actual text in your social image will be rendered as an "Overlay". So, you want to add an overlay with this button:
You then specify everything about the type itself, including the text content, with the Image ID input:
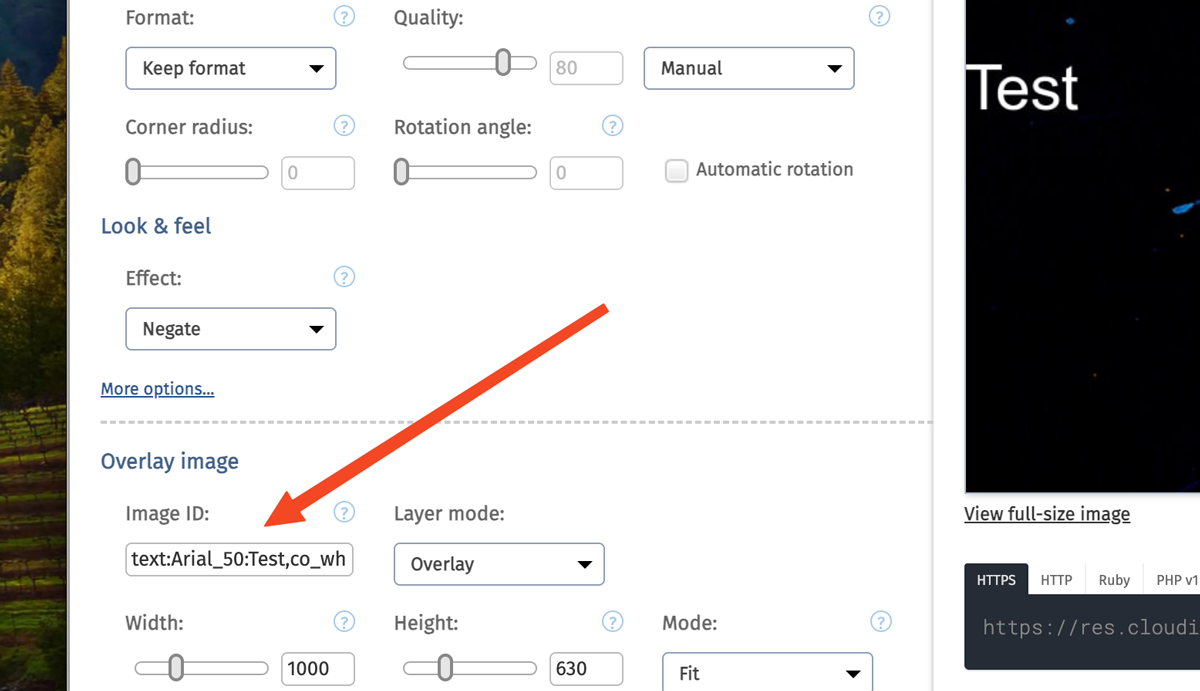
There is a syntax for how you specify a typeface and the text itself.
- Here is written documentation on how to set this
- Here is a video walking though how to make it work (jump links)
The thing to note is that this updates your image url with a new l_text string. It will look something like:
...,l_text:typefacename_size:Text you want
Separately, you can set the text's position with the Gravity setting, and an offset from the sides with the other options below.
Typeface choices
The documentation on what typefaces are available is confusing. It says most system fonts, and all Google Fonts, are supported.
(One pro tip - Google Fonts with spaces in the name use an _ for the spaces. e.g. Open_Sans.)
However, in the comments at the bottom of that page, they indicate that only popular Google Fonts have been added. So, it's a bit of a guessing game whether your desired font is supported.
In my case, I found that one typeface was not supported (Source Serif 4) and one was (Roboto).
I had to upload a version of Source Serif 4 in order to use it in my social graphics. That's a whole other procedure, and I'm not going to get into it now.
Experiment!
For this part - I can offer little guidance. You will need to play with the Cloudinary API itself and see what results that you can get. Keep in mind that there are quite a few styling options available to you.
Inserting blog post titles on the fly
Once you have a text overlay set up just the way you want, it's just a matter of creating a template that inserts your title. You can do that in nunjucks syntax with {{ title | urlencode }} . That looks like this in my template:
<meta
  property="og:image"
  content="https://res.cloudinary.com/chipcullen/image/upload/c_fill,e_negate,h_630,w_1200/c_fit,g_west,h_630,l_text:SourceSerif4Bold.ttf_70:{{ title | urlencode }},co_white,w_1000,x_20,y_20/g_south_west,l_text:Roboto_35:ChipCullen.com,co_white,x_20,y_40/v1669146466/pthalo_blue_texture_fyc8cy.png"
/>
Which, for this blog post, results in:

Previous: My current approach to AI